Nowadays many homeowners who want to refinish their garage floors start with online searches or queries with the neighborhood big-box store. Oftentimes, these inspired homeowners walk out with a do-it-yourself recipe that is sadly lacking a few key ingredients. Much like leaving out a key ingredient such as yeast when you want to bake a loaf of bread, it’s the missing ingredients that can make or break the success of your garage floor refinishing project.
The Facts about Proper Garage Floor Refinishing
You have undoubtedly heard the wisdom from the old days about how it’s all about the preparation. That is especially true with your garage floor. The initial preparation steps are essential to properly finishing your garage floor.
First of all, before any real action starts, the garage floor must be tested for moisture content. Some of those D-I-Y recipes often fail to mention how important is to determine how much water there is in your concrete floor. The professional installation team here at Garage Tailors Garage begins each and every floor refinishing project by conducting a moisture test at various sample points around your floor. You see, without the appropriate strategies to prevent water seeping up into your new floor finish, any existing moisture may well propagate through the concrete and lead to pop ups, peeling or even cracking. Knowing how much moisture is already there tells the installation team how best to proceed when your new floor coating is applied.
Now that the moisture content has been checked and recorded, the real preparation work begins. This phase of the project is referred to by the professionals as “opening up the pores”. For now, here’s what you need to know about this process. You might have seen or heard some recommendations to use muriatic acid to clean or open up the pores in your concrete floor. This is a lousy idea for a couple of reasons. As you know, muriatic acid is a hazard. You do not want to be using this chemical in an enclosed space, or certainly, not without the proper breathing attire, hand and eye protection, that sort of thing. But more importantly, muriatic acid does not actually perform well on older concrete to clean or open up the pores. Muriatic acid reacts with existing organics in or on your floor to bind them or lock them into the cement. Organics are substances such as oils, greases, plant matterand so on. When organic compounds are bound in place, instead of being chemically removed, it does not allow concrete pores from being opened up for a long lasting floor application.
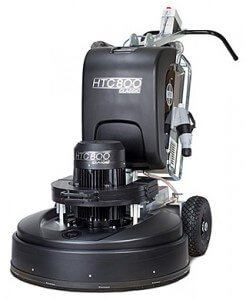
 Professional garage floor preparation is best accomplished by an abrasive grinding process which removes the top 1/16 of an inch from the top of your floor. Understand this grinding process is not even possible without the proper equipment. The commercial grinder used by professionals is equipped with a large circular carbide blade which removes the uppermost layer of the existing floor. Additionally, these industrial grinders are equipped with a continuously running vacuum which captures any resulting concrete dust. You will see the installation team wheel this monster tool into your garage and then carefully grind the entire floor.
The newly exposed concrete is now ready for the next phase of the project. At this point, the installation team does an exceedingly careful inspection of your garage floor. They look for and carefully identify and mark any cracks, voids, pitting, etc. These areas are then carefully repaired one by one with hydraulic cement, a common concrete material found at the big box stores. This patching material is a fast-curing concrete repair material. This repair material is allowed to dry, which takes less than an hour.
At this point, your preparation steps are just about complete. The installation team carefully sweeps up any loose material, smoothes out any rough repair material and ensures the entire surface is ready for the next step. After removing all the loose material, the team works on the moisture barrier. In this case, the moisture barrier is a solution that is carefully and methodically applied to the entire surface of your floor. This highly specialized sealant material penetrates through the freshly opened pores of the concrete to bind the sealant and create that essential water barrier that prevents floor coatings from lifting. Once it is dry, this sealant protects your floor and your new floor covering from moisture intrusion.
Does all of the above sound like a lot? Well, for a homeowner or a weekend D-I-Y ‘er, it might be, but for the professional installation team here at Garage Tailors Garage, it’s all in a day’s work.
Next: Once the floor is prepared, how is the new floor coating applied?

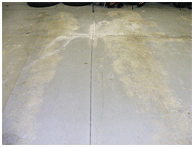
 First, take a look at the state of your cement floor. If there is excessive cracking and pitting, the holes will have to be filled before a coating can be applied. In this situation I recommend a pvc tile that will protect the floor while hiding those imperfections.
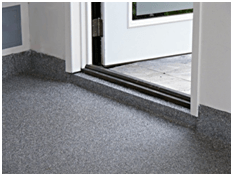
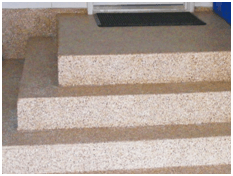
 First we’ll test the moisture level and, if the moisture level is more than 70 per cent, you will need a water barrier. Then we repair any cracks and grind the floor down to get rid or minor imperfections and open the pores in the cement for proper penetration of the coating. We’ll also apply a moisture seal if necessary to prevent water from coming through the surface of the floor. You can then choose from myriad colour choices to complement the rest of the garage. We can even custom mix colours to match other design features. A base coat is applied and a combination of colour flakes are sprinkled on and left to cure. We then remove the excess flakes, chip off sharp edges, vacuum and apply a top sealer. The whole process can be completed in less than a day. Then all you need to do to maintain it is to clean it with soap and water or hose it down with a power washer a couple of times a year.